Felting: the fabulous art of removing air
and wonderfully clean hands!
What is Felt? Very simply, felt is matted wool. Wool becomes felt when it is subjected to moisture, heat, and pressure. (In fact, if domestic sheep were not shorn, over time their wool would felt or "cot".) Hot soapy water makes the wool slippery, and causes tiny scales on the fiber to "open up". The scales prevent the fibers from backing up again after they slide across each other; with agitation, the fibers get hopelessly tangled together. When cooled and dried, the scales close and lock the wool into the tough, durable material we call felt.
For this first project you will need a nine-inch cake pan, some liquid detergent (Joy, Dawn,etc.), a kitchen sink, hot and cold water, and about 30 minutes.
|
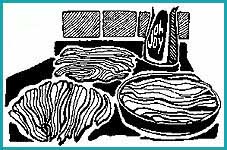
Laying Out the Wool
Lay out a half-ounce of washed and carded wool. Divide into three equal
portions. Spread out the first portion so that the wool evenly covers the bottom
of the cake pan, with all of the fibers running in the same direction. Place the
second layer on top of the first with the layers at right angles to the layer beneath.
Repeat with the third layer, arranging the fibers cross-ways to the layer below.
|
|
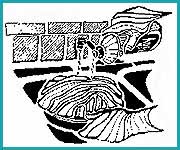
Wetting the Wool
Squirt a small amount of liquid detergent over the top layer of wool. Then
gently pour about a half cup of HOT water over the wool.
|
|
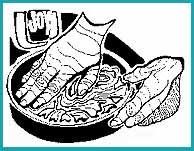
Pressing Down the Wool
Press straight onto the wool pile so that the wool compresses into a mass on the bottom of the pan. Add more hot water until all of the wool is wet. Work around the edges, pressing down until all of the wool is matted down.
|
Working the Wool
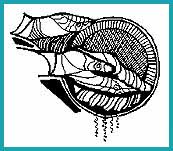
Hold the pan in one hand, while you gently massage the edge of the wool with the fingertips of the other hand. Use your palm to gently agitate the center. Slowly rotate the pan as you work. Keep rolling the edge of the wool slightly inwards to give it a smooth, finished shape. The soap will squish up between your fingers and the wool will matt togther. After about 5 minutes the wool will begin to firm up, and you can begin to work with a more vigorous circular motion.
|
|
Turning the Felt
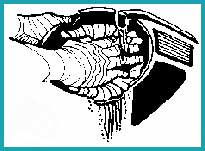
After about 10 minutes, the felt will hold together well enough to turn it over. Tip the pan and gently flop the wool out into your hand and place it upside down in the pan. Add more soap or hot water if necessary, and continue working the wool as before.
|
|
Rinsing
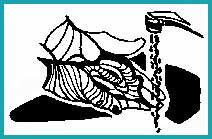
Run warm water into the pan and pour off the soapy water. Then run cold water over the wool and press the water out of it. It should be round, about an eighth of an inch thick, and a little smaller than the pan. It should be felt! If you continue working it, it will grow thicker and smaller. Its not that you are losing wool, its that you are losing air spaces.
|
|
Fulling the Felt
(You don't have to do this part) If you want the felt to be strong, continue working the felt by running more hot water over it, and rolling and squeezing it in your hands. The more you do this, the "fuller" (thicker and stronger) it becomes.
|
Pressing and Drying
When you're finished felting you may want to use an iron (set at "wool") to speed up the drying and flatten it out nicely. Congradulations! You're done!
What to Do Next
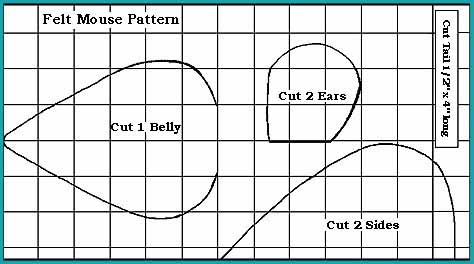
Well, you could make hot pads, coasters, Christmas decorations (these need sequins, etc.) or pincushions, and balls. To make balls, do this: wrap layers of wool strips tightly together, like you were winding a ball of string. Using hot soapy water, roll and work the ball in your hands. Or, tie the ball of wool into the toe of an old nylon stocking and let the washing machine felt it for you. My personal favorite is the felt mouse toy. Cut the pattern from unfulled felt; sew together, add a felt tail and eyes. After assembly, full the wool to shrink the mouse, or fill with catnip or beans (for a bean bag) instead.
Would you like to see what I do with the felt I make? Here are photos
and prices for my "one of a kind" hand felted
stuffed animals:
the "Wool Hog," "Wool-Adillo," "Aurora Bear-Ealis," "Woolotter," "Woolie Wabbit," "Fabulous Felted Trophy Trout," and "Wool Puppy".
Here is also a "gallery": examples of Soumak
Tapestries
woven by Joanna Gleason. The tapestries which are woven of my handspun wool also have a handfelted wool mat around them. Another use for handfelting!
The web server charges a bandwidth transfer fee every time someone downloads one of our free instructional pages.
Please help the sheep pay for downloading this page.
Click on the Typing Sheep above to make your donation using Paypal.
Your donation is gratefully accepted ... thank you, thank you, thank you!
[an error occurred while processing this directive]


