|
|
|
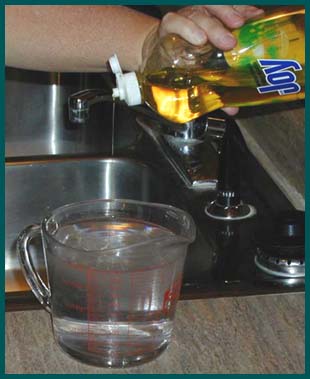
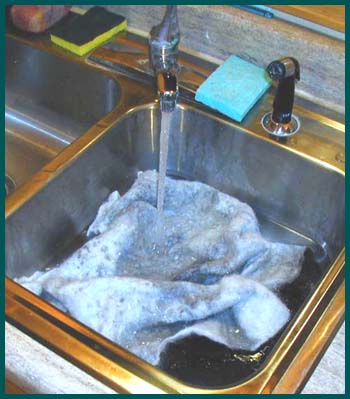
You don't have to work with the water this hot, but I think the felting goes faster when the soapy water is this hot.
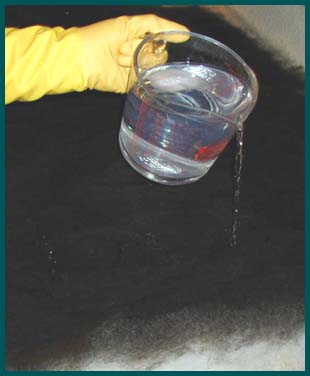
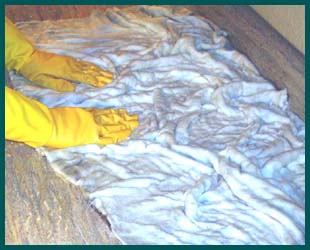
Pour small amounts of the hot soapy water over the layers of wool.
|
Begin at one corner and gently press the wool down so that the hot water soaks into all of the layers of wool. Work your way all across the entire piece of felt. It will be surprising just how flat it will become after starting out so fluffy and thick. |
|
|
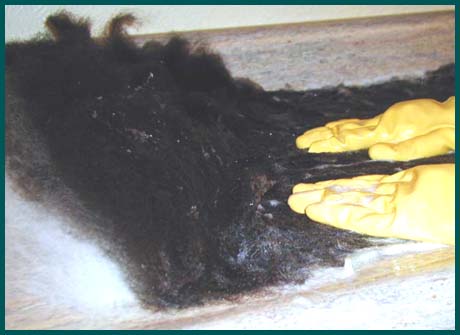
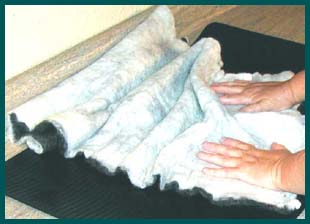
As the wool holds together better, and you become sure that you will not rub holes in the felt, you can rub with more pressure and with a more vigorous motion.
As soon as the piece will hold together well enough, turn it over and work the other side of the felt in the same manner.
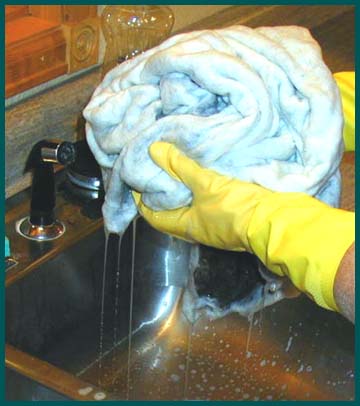
At this point its a good idea to squeeze the soapy water out of the felt and do some rinsing. Alternate using hot water and cold water... this will help remove the soap. |
|
|
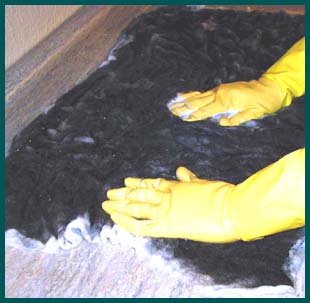
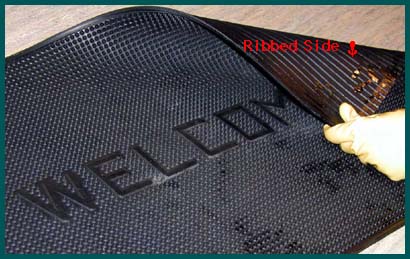
For fulling, I like to use a rubber "Welcome" mat that I found at the Wal-Mart. I don't use the welcome side, but rather the back side which has ribbing about every half inch. Some folks use "match stick" place mats, old fashioned wash boards, and "bubble wrap" used in shipping. The idea is to rub the wool over some surface with texture. This reduces the amount of work on your part in the final finishing of the felt. |
|
|
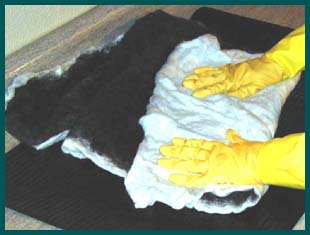
Then you will be able to rub the felt over the mat with great pressure and a strong motion. It won't be possible to rub a hole in the felt. You should turn the felt in quarter turns so that it is worked in all directions.
Turn the felt over and work the other side in the same way. The longer you work the felt the more dense it becomes. You aren't losing fiber, you are decreasing the air spaces between the fibers, and so the piece becomes ever thicker/denser and smaller in overall size.
Finally, when you are satisfied with the look and the feel of the felt, you should run cold water into the sink and do a cold water soak to be sure all of the soap is rinsed out. Press/squeeze the water out of the felt and use the "Spin" cycle only of your washing machine to remove all excess water. While still damp, press both sides with an iron set on "Wool". Allow to dry on a flat surface. The amount of shrinkage in the piece shown in this demonstration was: original measurement of 23" X 38" which became a piece that measured 18" X 34" X 1/4" thick.Different types of wool, meaning finer or coarser in fiber diameter and with a difference in crimp would felt differently with more or less ease and with more or less shrinkage. The character of the felt can be greatly altered by blending in mohair or angora. This would create a very "fuzzy" felt. There are as many different looks and feel to hand made felt as there are breeds of sheep and folks making felt. If you can't seem to make the sort of felt you want, consider changing the wool you are working with, or blending the fiber you have with yet another breed of sheep's wool. The possibilities for the effects you can achieve are endless! |
|
[an error occurred while processing this directive]